Tips to Render White Products Against White Background

Rendering white products on a white background is quite challenging for any designer or artist. While designers are using white backgrounds to influence the overall look of the products, the real problem is how to render white on white. Because it tends to merge with the designs, creating ambiguity and often ends in concealing details of the products.
So, how can you render a white product against a white background? In this blog post, we will discuss the tips that you can master.
Tips for White Object Rendering on White Background
Tip 1: Lighting would not have the same color
 Lighting would not have the same color
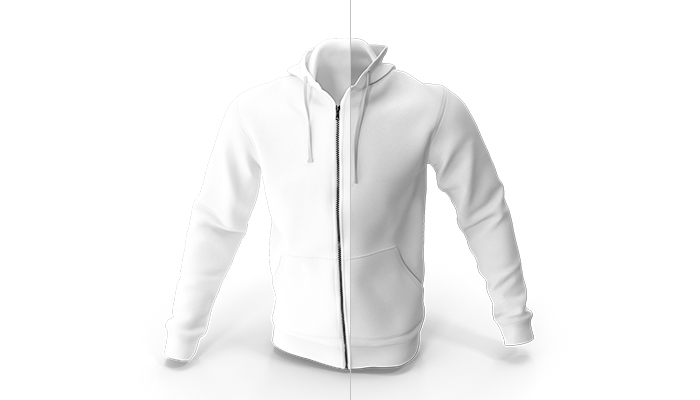
First off, you should understand that the background, object, and the lighting would not have the same color. When you use 3D rendering program, by default, the color of your object, background, and the lighting would be white. This makes the product and its background appear undistinguished. So what’s the solution? You should note that neither a product nor a background is purely white.
So you should select a color that’s 98 percent white and this would make the product appear more prominent against all white background. You may even put a tinge of blue to boost the perception of whiteness or you may even add a touch of yellow to instill a feel of warmth. You should try to create a contrast between the product and the background. You should use a cooler or warmer shade of white in order to create the contrast that will be easy for people’s eyes to easily notice.
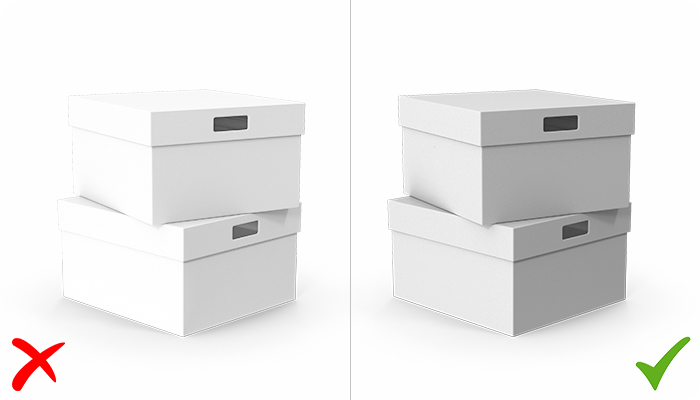
Tip 2: Define a product’s shape
 Define a product’s shape
The second process demands a certain degree of expertise, but it can definitely make your product appear stunning even if it is a plain product without too much detailing. Apple sets a classic example in this aspect. Apple’s products feature geometric curves and lines and they are typically highlighted through perfect lighting.
For example, the Airpods are set against the white background in such a manner that lights and shadows are cast at the most appropriate places. There’s no need to throw light on the edges as the edges would then become undistinguished from the background. Define a product’s shape by instilling a shadow around the product’s edges. so that the gray outline can easily define a product’s shape.
You may also add some light in such way that a shadow is cast on the foreground along the product edges. You may even create distinct environments by applying lights in the most appropriate places.
Tip 3: Glossy touch to the product
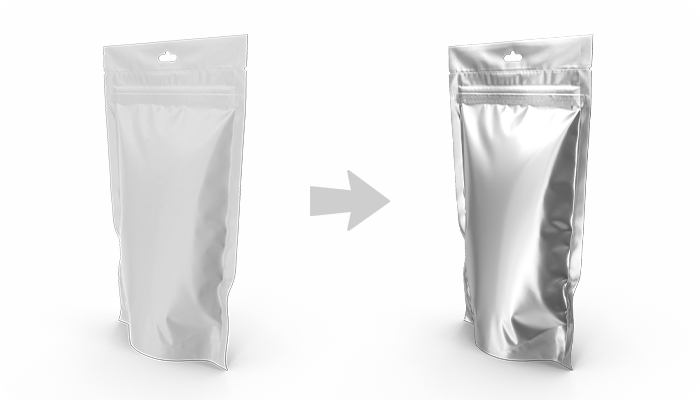 Add a glossy touch
Add a glossy touch to the product. This would make shadows and highlights appear more prominent. If you are working on a matte finish, the lighting might appear blurry. The environment should feature well-balanced dark and light elements, which would make the matte product appear more distinct.
Tip 4: Create the highlights
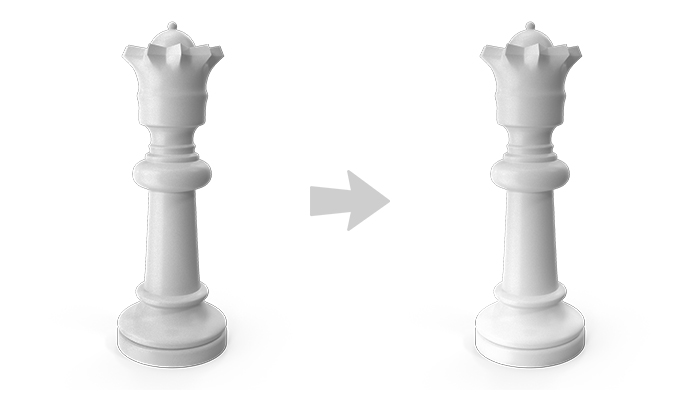 Create the highlights
If you are still not able to get the highlight that you are looking for, you may consider trying out this trick. You can use Photoshop or any other photo editing software to create the highlights. With this approach, you will gain better control over your render and add artificial highlights that would make your product look flashier.
Tip 5: Adjust Image Contrast
 Adjust the image contrast
You can increase or reduce the contrast in your images manually. While doing this adjustment, if the black details in your images get lost, use Photoshop’s Curves tool to boost the power of the grays. This way, you are leaving the whites and the blacks as-is.
You will now be making the semi-white portions appear grayer. Incorporate a vignette in the image so as to form a spotlight and a distinct border.
Useful Article : How white backgrounds impact consumer behaviour?
Rendering white object against a white backdrop is really difficult, so you need to work with a visual or a mental reference. Things become a bit easier for you when you have clear idea about what exactly you want, where you want the highlights to be, and where you would want to place the shadows.
Contact Us